The entire process of building this rosette, from dyeing individual pieces of veneer to assembling and finishing it, is described below. Each section is quite comprehensive, and can be expanded and collapsed via “More…” and “Less…”.
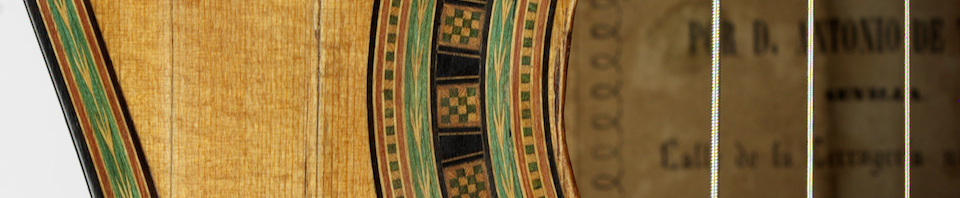
The Torres rosettes have proven to be an interesting challenge, since I decided to start them from scratch. All veneers are cut from raw lumber, and thicknessed and dyed in my workshop. I found that an interesting aspect of this project is nicely explained using the decorative issues: Why imitate someone else’s work?
I found that the learning curve is very steep when it comes to imitating another maker’s work – imitation forces me to build and use shapes and patterns that may not have come to my attention if I had relied exclusively on my own taste and inspiration. The limitations I put upon myself to manufacture all these components using the same species Torres is believed to have used, and learning new processes such as veneer dyeing, have all turned out to be extremely enriching for my guitar making practice in general. I am sure much of the gained knowledge and experience of this project will make it into my contemporary instruments that are based predominantly on my own creative efforts.
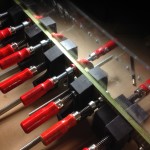
The first process I would like to describe here is the dyeing of veneers. Since some of the veneers in the rosette of the FE 18 are much thicker than what is commercially available, I had to dye my own veneers. I had tried several methods before (slowly cooking the wood in the dye solution, and also putting wood and the dye solution in a vacuum), and was never quite happy with the results.
Dye testing
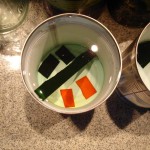
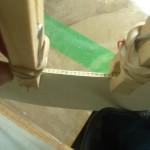
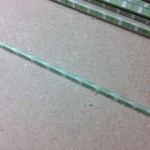
What finally worked for me best was the pressure cooker. I mixed several batches of dye solution, cut different types of wood samples to find what species suits me best (while choosing only from the wood types that Torres is believed to have used), and played around with dye concentration, order of dyeing, and colour mixtures. Finally I achieved the best results by using two different colours in the same dye solution (Rit dye: Golden Yellow and Kelly Green). I used 1.75 teaspoons of each colour in a total of 4500 ml of water. This concentration gave me reliable results through to the core of the wood @ 1.0 mm thick. The wood used was Ilex latifolia, also known as Holly, and I pre-cooked it for 10 minutes before adding the dye to the water. Total cooking time under pressure was 2 cycles (45 minutes each) in the pressure cooker.
Dye testing (pressure cooker)
________________________________________________________________ Making the ladder motif
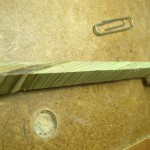
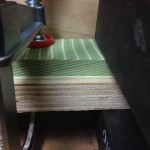
The ladder motif is built from some of the pieces which are also used for the checkerboard pattern. The long strips of wood (green and white) are glued onto a carrier veneer, and then the entire sheet gets thicknessed until the cross section displays perfect little squares. From this sheet, one can cut individual strips which in combination with another white veneer strip turn into the ladder motif.
Checkerboard pattern
Ladder Motif – main component
Ladder Motif
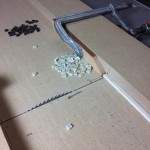
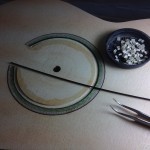
________________________________________________________________ Making the checkerboard motif
For this project, I decided to explore a technique of inlay that was commonly used by the Spanish guitar makers. When rosettes were still custom built for every instrument, its components were glued individually. Especially when dealing with many small pieces, it can be quite helpful to separate the inlaying and glueing into several stages.
________________________________________________________________ Making the wheatear motif – Part I, II & III
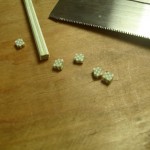
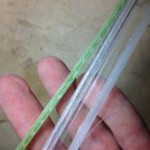
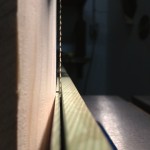
In the process of building the wheatear motif, I had to revise my technique for thicknessing the wheatear sheets a few times. I had predominantly used a technique suggested by J.S. Bogdanovich in his book, which by the way I find is an excellent book dealing with the fundamentals of guitar making. Since my wheatear motif needed to be planed down very thin (to a thickness of 0.5 mm), I ran into issues of glue failure. My wheatear sheets came apart before being of final thickness, and that day my workshop was a rather gloomy place. I then took a good look at Torres’ original work and found inspiration – and probably found the solution to my problem that Torres may have used himself. It looks like where he used the wheatear motif in his FE 18 guitar, there is always a green veneer strip on the outside. I assume this outside veneer acted as a backing veneer, which gave his wheatear sheets the necessary strength to be planed down so thin. Now that my sample piece was easy to plane down, using the hand plane for a flawless joint surface, I am ready to reassemble some green and white veneers to make my final wheatear strips. Below is a picture of the test wheatear, and the very thin shavings. When one builds components for such fine inlay, it is important to work with precision and diligence, trying to keep the error below 1/10th of a millimeter.
Wheatear Motif Test Wheatear Motif Test
My experience with the wheatear motif has been a perfect example as to why one would want to imitate a historical instrument. By strictly following the aesthetics of the original, I ran into certain obstacles that I may otherwise have avoided altogether. When my first attempts to build the wheatear motif failed, I could have easily chosen a thicker design on one of my own designs; adapting the instrument design for convenient work methods. But the fact that I had to work the wood to a predetermined thickness ultimately forced me to analyse Torres’ work in more detail and learn new techniques. The devil is in the detail. The idiom “the devil is in the details” derives from the earlier phrase, “God is in the detail”; expressing the idea that whatever one does should be done thoroughly; i.e. details are important. (from Wikipedia) Both of the phrases above prove themselves true many times over in instrument making. Today I would like to focus on why it is the devil that is found in the detail. Specifically how the devil is in the absence of a backing veneer. When this saying is used in German (“Der Teufel steckt im Detail”), one generally refers to something small that has been overseen (or ignored), which in turn leads to a whole bunch of problems which could have been avoided. I must admit that I wasn’t always focused on detail, and I sometimes felt that thorough and precise work was something reserved for the meticulous and pedantic mind. But suprise surprise, during my career I have begun to accept and even love the attention to detail. Seriously.
Wheatear Motif – building process
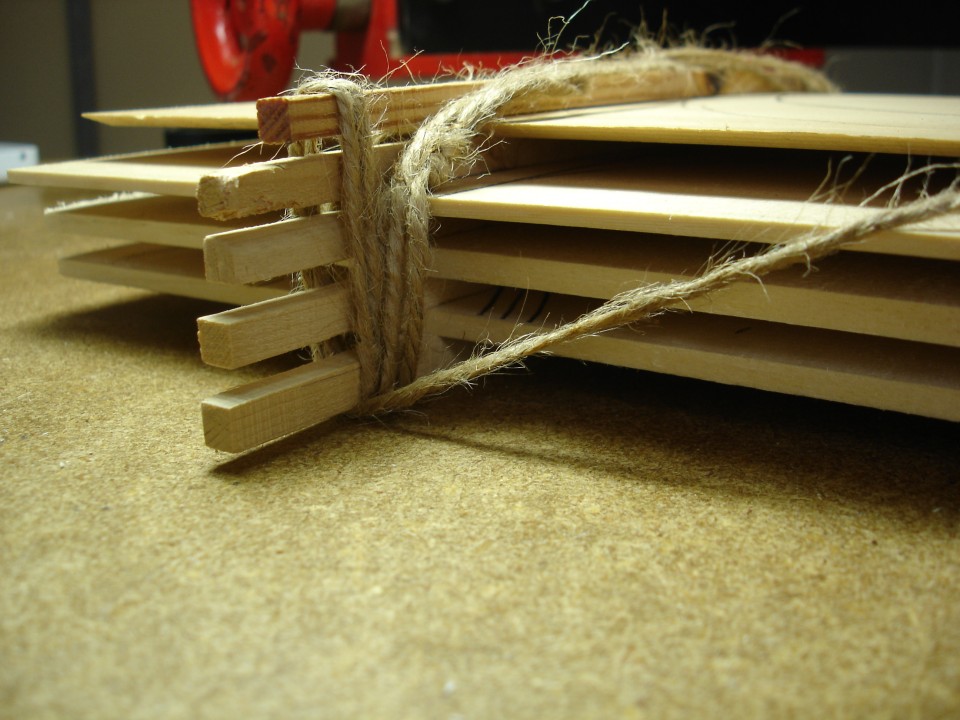
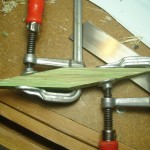
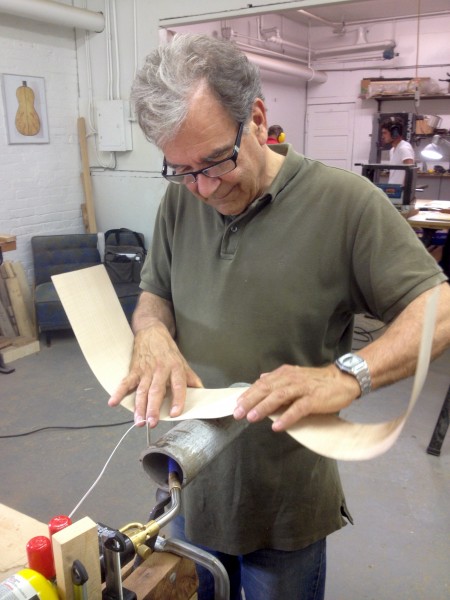
When I was recently working on the materials for the rosette pattern in my Torres replicas, I was studying and learning new techniques. Whereas bracing patterns and wood selection are an ever-present topic in guitarmaker’s schools and symposiums, the art of making you own rosette materials is rarely taught. Which is why during this year I have started teaching myself. After exploring wood dyeing techniques, and building special jigs to thickness my veneer sheets, I have been working on perfecting the wheatear motif. Building the wheatear is a long process, and can hardly be finished in a day. Many sheets of dyed or differently coloured veneers are glued together, until one has a big block of veneers. This block then gets cut at an angle, reglued and planed, thus creating a long block of stacked veneers from which one can cut sheets of wheatear. Which is where it gets tricky.
Wheatear motif test
Here is why: The wheatear motif in the Torres rosette is approximately 2.5 mm wide. This means it consists of 5 strips, each of a thickness of 0.3 mm and 0.6 mm. If you take one of the wheatear strips and try to bring it to final thickness (0.5 mm), it easily gets eaten by the sander (powertool technique) or torn by the plane (hand tool technique). After ruining 80% of my wheatear stock this way, I had to sit down and recalibrate. Obviously, no matter what technique I used (I used a fellow guitarmaker’s instructional book as guidance), a huge amount of wood was lost to breakage. The one thing I had learned at that point is that the hand-tools did provide nicer and more precise results for me. I wanted to continue thicknessing these striped sheets by hand; the question was how to do it without breaking most pieces and cursing myself (or the wood) all day. I pondered over my large-formate glossy prints of Torres’ rosette, until it struck me that he used green continuous veneers right beside his green and white wheatear. This led me to the conclusion, that this green veneer was glued on the wheatear before thicknessing, and therefore held all pieces together when planing them to thickness.
Wheatear with backing veneer
This moment was a beauty, and I actually yelled out “Heureka” at my workbench. It helped me to work with the traditional technique which Torres probably used as well, and also enabled me to produce very fine and delicate wheatear strips that characterise his work. This type of realisation stemming from imitating the old masters is exactly what I came looking for when I started this project, and I am thankful for this man to have taught me post-mortem.
Part II
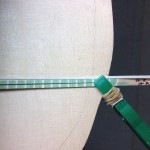
As mentioned above, the alignment of the angled white veneers is important. In the gallery below you can see how the wheatear motif is glued before bending it into shape. However, I suspect that the results may be unsatisfactory, and the wheatear needs to be built on the white centre strip instead of the green outside strips.
First component is secured in jig
Centre strip gets glue on both sides
Centre strip is laid on the first strip and secured
Before the glue dries alignment is checked
Bending the wheatear “stick” is certainly possible. However, there are two issues that arise:
– The stick bends in the opposite direction directly beside one is working, creating an “S” shape.
– The veneers easily delaminate and may lead to unsightly joints once forced into the rosette channel.
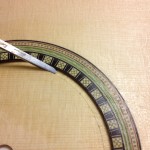
Below are some pictures to illustrate the issue:
Part III
The third version of the wheatear motif is built around a single carrier veneer in the center. This veneer will be the white line in the original instrument, and enable the “flexible” angled veneers to wrap around the center strip, making it easier to bend the strip around tight curves.
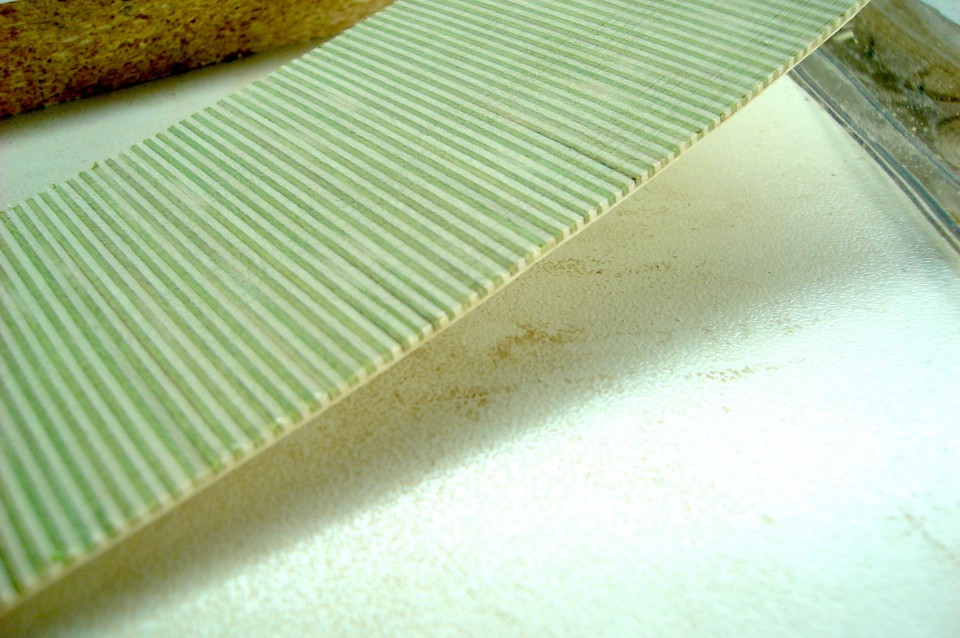
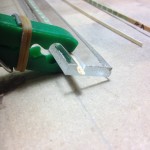
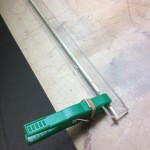
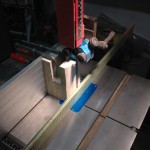
The gallery above shows how the veneer block with the angled pattern is glued on a thin white carrier veneer. After the glue cures, a thin sheet can be cut from the block with a band saw. Note the special resawing guide that is clamped to the fence. A resawing guide helps to cut thin sheets precisely – freehand. This method can be much more accurate and significantly less wasteful than using the traditional band saw fence.
The sheet I cut from the block is approximately 1.5 mm thick. It will need to be planed to final thickness (0.9 mm) before being glued back on the angled pattern veneer block, creating the wheatear motif.
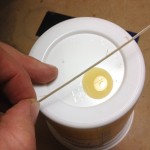
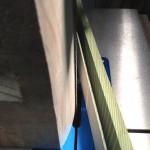
The gallery below shows how a square can be used to get a reading on the thickness of the wheatear sheet – if I was to remove material only on one side, the pattern would become crooked. Once the sheet is brought to final thickness (1.2 mm), it is glued back onto the block, matching the diagonal lines as best as possible. (Part I provides the most precise book match of the wheatear pattern, but was unfortunately useless due to its rigidity)
Now that everything is glued together properly, the process is repeated. The sheet of the now completed wheatear is cut from the block, and again planed to thickness from the other side (the one that was just cut on the band saw). The result is a sheet (see below) that gets turned into single strips. These strips finally have the flexibility I was looking for, and I anticipate the rosette inlay to be easy and precise.
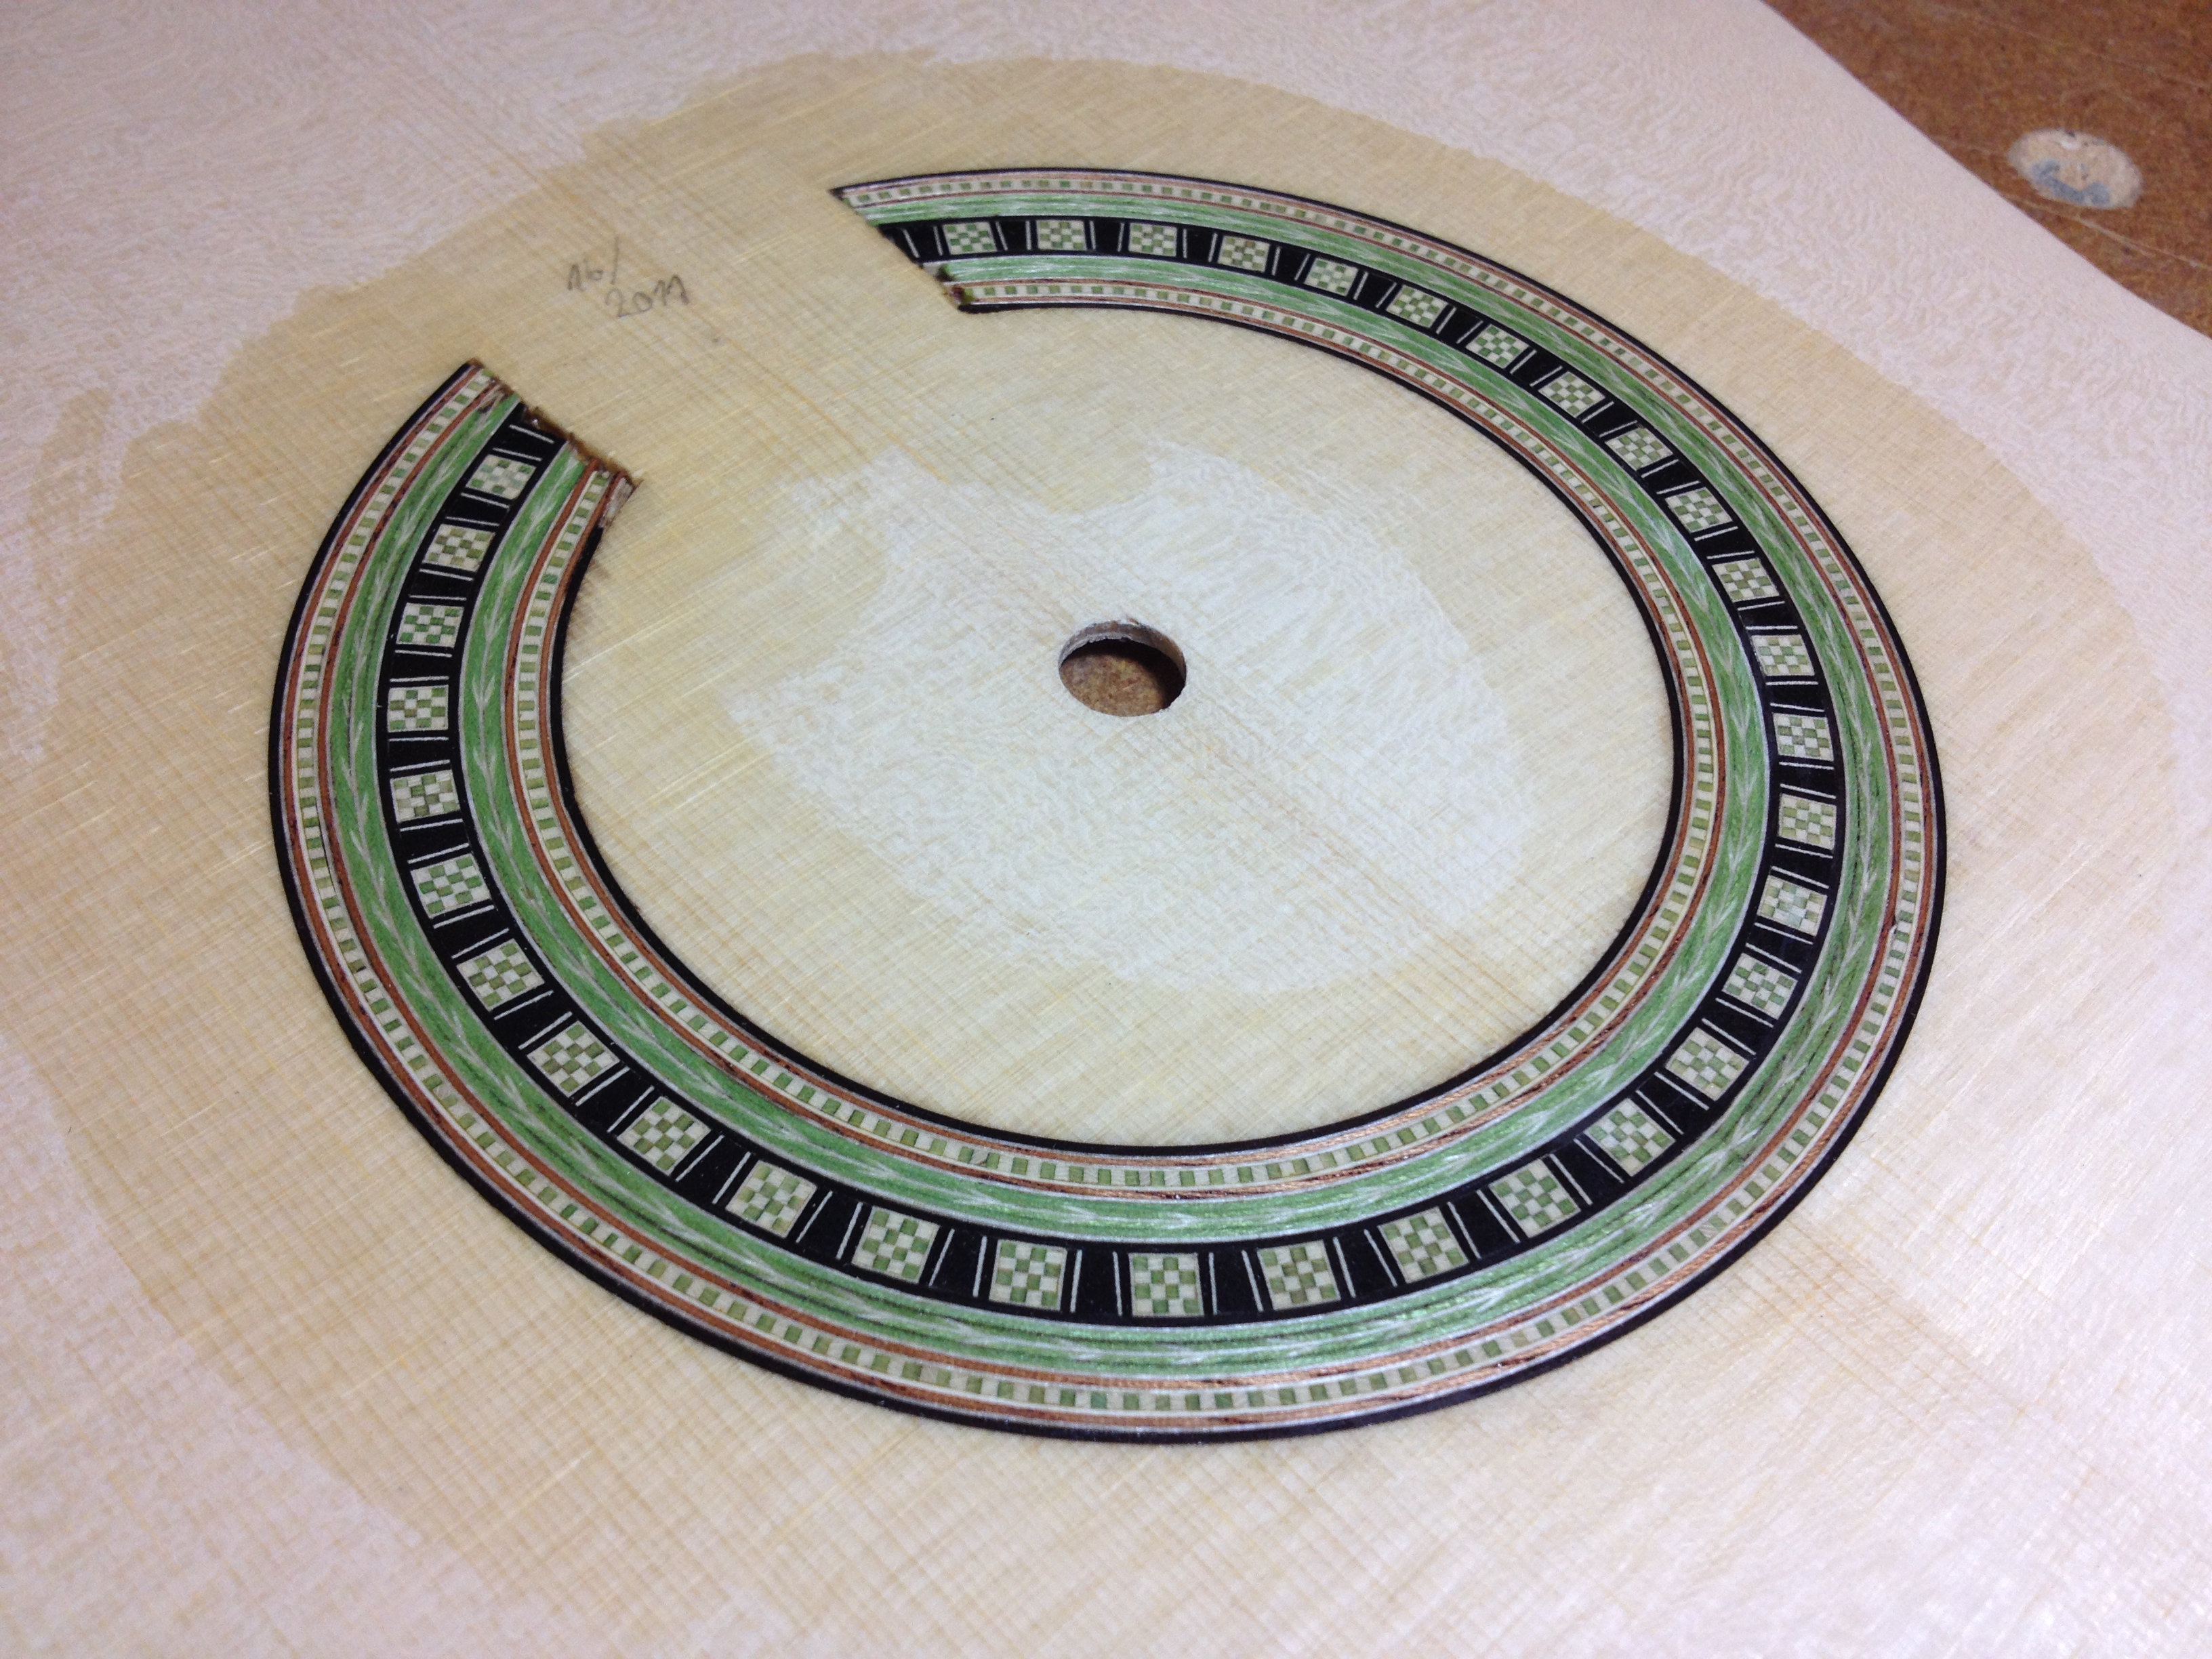
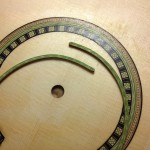
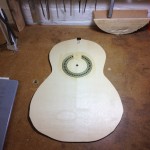
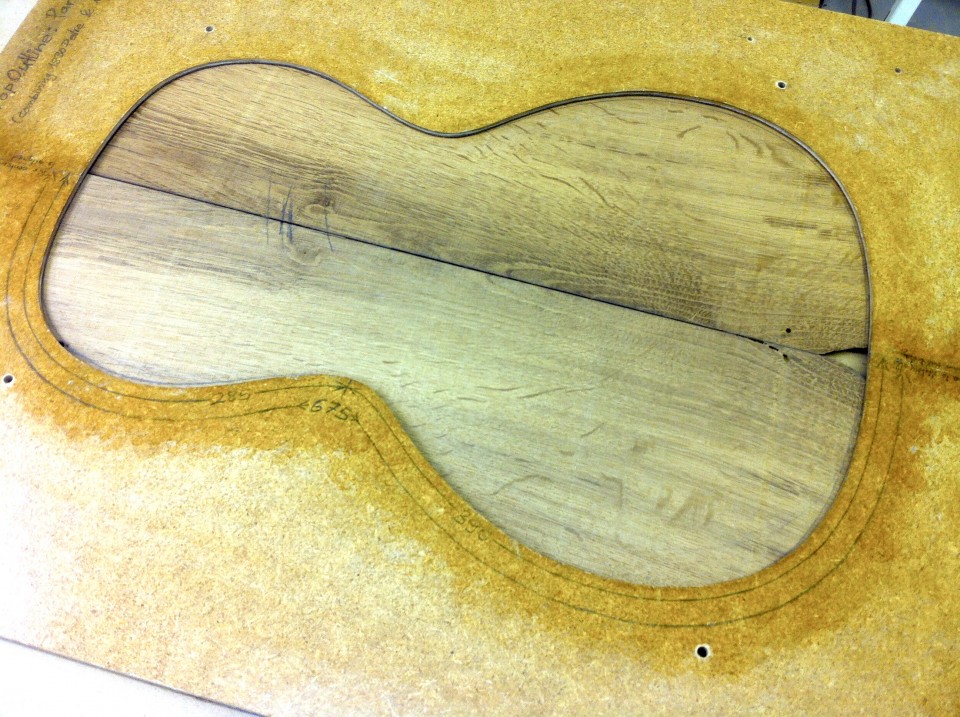
The gallery below shows the assembly of the prototype rosette; some features are not perfectly executed and the approach of exact replication is not a priority. The wheatear patterns in this rosette were built during the experimentation processes “Part I” and “Part II” as outlined above.
This prototype is ideal to assess how the different rosette making techniques will look under a French polish, and also enable me to be a little more reckless with the instrument later, when it comes to artificial aging with UV exposure and potentially even making a faux vintage French polish.
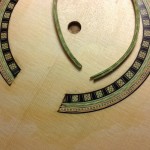
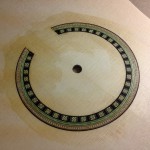
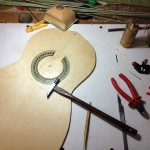
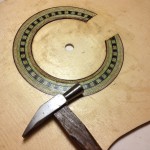
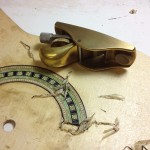
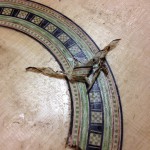
The challenge with this technique was the removal of wood in several stages – with prefab rosettes one can remove the wood from the rosette channel in one session and then glue the rosette in. When assembling a custom rosette with so many individual pieces however, one may prefer to inlay the entire rosette in 3-5 stages. Each stage consists of cutting one circle and glueing the inlay components. Once the glue has dried, the next ring can be cut right next to the previous one. While the latter method sounds a bit more time consuming, there are definitely advantages to breaking the process up – anyone who has ever had a fully dry-assembled rosette with hundreds of pieces pop out just before glueing knows what I mean. The biggest challenge at this point was the removal of wood on the bottom of the channel without damaging the surrounding areas with the chisel. The tool I would traditionally use for this (a small router plane) doesn’t fit into the channel, so I had to cut everything with a narrow chisel, freehand. Which takes a bit of patience and concentration.
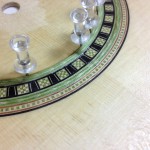
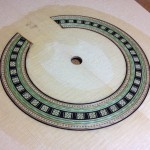
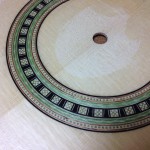
And, finally, the finished rosette. The pictures below show the rosette “in the rough”, with all the caked on hide glue (the last steps did get a bit hectic and messy).
And then the same rosette after a few passes with a small block plane, some sanding and a protective layer of shellac.
Cutting a rosette in several steps (e.g. cutting a channel, glueing inlay, cutting the next channel beside it, and so on until it is finished) is more challenging than just cutting one single broad channel, but it has a few advantages:
a) If some of the inlay is irregular in thickness, a careful pass with the circle cutter helps bring every single inlay ring back into circular perfection. This is important to achieve clean results, and also looks very clean.
b) Rosettes that contain many small pieces are easier to assemble, and spring back accumulating from over 20 veneer strips is minimized. The dry assembled rosette will not “explode” and complicate the work process.
c) The downside is that this procedure can take a bit longer, and one needs to have skill with a chisel. In the narrow channels, a router plane may not fit and/or be too risky to use, as it may damage the surrounding area.
d) What veneer groups go into the rosette per channel needs to be carefully planned out. I recommend grouping by inlay patterns and ensure that group joints are beside a dark veneer to hide pin indentations and glueing flaws.
e) The last group to be glued should not be on the edge of the rosette, but somewhere in the center. I call this the “compensation section”, as this is where one can address deviations between measurements in the rosette drawing and the actual veneer and glue joint thickness. The compensation section should be a mosaic-style pattern, as it is easiest to fit in the last channel. (Glueing strips into a tight-fitting channel at the end, while battling swelling from hide glue, can be very stressful and yield mediocre to poor results.)
The ladder motif as presented in the above work process can be improved. Experimentation with glue types is due, in order to eliminate the brownish glue line on one side. Ideally, hide or thin fish glue would be used for this.
The checkerboard motif is very fragile around its edges, where there is a border of 0.1 mm end grain veneer. Be aware that the table saw can tear this thin veneer to pieces when cutting the checkerboard sticks. Either resort to a hand saw if necessary, or find a foolproof method to glue the thin white boarder onto the checkerboard sticks.
The perfectly book matched wheatear veneers as presented in the Bogdanovich book can be used, but bending is quite problematic. The wheatear method (part III) may be more suitable, but it doesn’t provide a perfect book match.
Pre-glueing certain sections could be useful, as dealing with individual veneer strips can often be a bit annoying. Single veneers strips break easily, or they sometimes fold underneath its neighbour during the gluing process. Pre-bending rosette components is highly recommended, since spring back is very unproductive during this work procedure.
As mentioned before, I am using imitation as a means to study luthier techniques that are new to me. In this process many flaws come to surface, and I dedicate my time to identifying their causes and the appropriate remedy.
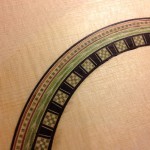
The gallery below illustrates the issue of proper alignment of the two strips that make the wheatear motif. The first picture shows how each strip consists of two book matched pieces to ensure perfect alignment of the angled white veneer.
If you look closely in the centre picture however, you can see that the wheatear starts running “out of phase”, which is contributed to the book matched pieces being laid into the rosette channel individually. Another issue, visible in the picture on the right, is how the joint between the rosette components is too irregular.
I attribute these issues to the new technique of inlaying the rosette components individually. These issues should be resolved by glueing “batches” that are pre-glued. For example, the wheatear motif can be glued and later bent, so that the angled white veneers maintain their alignment. Also, the joints will be homogenous and much tighter.
If you have enjoyed this thorough description of the rosette building process, and you feel that it has served as useful instruction for your own work, please consider donating a small amount to help me offset the cost for maintaining this website. Thanks!
 The entire process of building this rosette, from dyeing individual pieces of veneer to assembling and finishing it, is described below. Each section is quite comprehensive, and can be expanded and collapsed via “More…” and “Less…”.
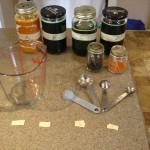


")


One Response to Rosette Making